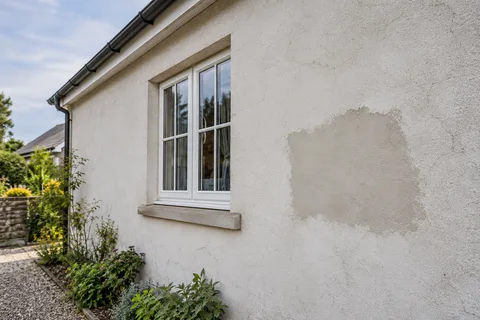
Wollaton exterior walls
Recording wall repairs before an insulation system covers them
Once external wall insulation is installed, much of the original wall is no longer visible. That makes the preparation stage an important opportunity to establish its condition and keep a usable record of the repairs. The record should explain what was found, what was done and who accepted the work before it was covered. A folder full of unlabelled photographs rarely achieves that on its own.

On this page
Begin with the existing condition and the design assumptions
Label the elevations and photograph them before preparation starts. Include visible cracks, patches, staining, redundant fixings and changes in construction. Keep a wider view with each close-up so its position can be identified later. Note any previous repair information supplied by the owner, but distinguish documented work from recollection or an assumption based on appearance.
The designer needs to establish which findings affect the proposed insulation system. Loose surfaces, unresolved water defects or uncertain construction can change the preparation and fixing requirements. Record the questions that remain open and who is responsible for resolving them. A drawing should not quietly assume that an uncertain wall is sound simply because the programme needs a start date.
The external wall insulation guide explains the wider design task, including openings, eaves, services and the ground junction. Connect the repair record to that design. A crack beside a window may affect a local preparation area, while a change in wall construction may require a broader specification decision. The record becomes useful when it shows those relationships rather than treating every photograph as an isolated defect.
Avoid drawing conclusions that the evidence cannot support. A stain does not establish a particular moisture mechanism, and a narrow crack does not by itself prove that movement has stopped. Where specialist assessment is needed, keep the relevant advice with the record and identify any conditions attached to it. The insulation contractor should know which issues have actually been resolved before work proceeds.
Record opening-up and repairs in a consistent way
When material is removed, photograph the exposed area before it is repaired. Include its elevation label, approximate extent and the date. Describe the layers or construction actually observed without guessing at hidden areas beyond the opening. If the findings differ from the initial survey, record the proposed change to the work and the person authorised to approve it.
For each repair, note the material or system used and the preparation carried out. Keep relevant product references and instructions rather than a vague entry such as “filled and made good”. If a previous incompatible patch is removed, record that too. Future maintenance may need to understand why the area was treated differently from the surrounding wall. The render repair guide discusses choosing a suitable repair boundary and matching the existing construction.
Photographs should be taken at a scale that shows the detail clearly, with a wider location image available. A sequence can be more useful than one attractive finished picture: original defect, exposed background, completed repair and accepted condition before covering. Keep the sequence short enough to navigate. Hundreds of near-identical images can obscure the few that explain an important decision.
Use the same naming convention throughout the project. For example, an elevation label and numbered area can connect a photograph, drawing note and inspection entry. The exact format matters less than consistency. Avoid storing the only explanation in a messaging thread that a future owner or maintenance contractor will not have access to.
| Field | Purpose |
|---|---|
| Location | Connects the record to an elevation and detail |
| Finding | Describes what was actually exposed or observed |
| Decision | Identifies the agreed repair and approval |
| Material | Records the product or specified repair construction |
| Inspection | States who checked it and any remaining conditions |
| Evidence | Links dated photographs and relevant documents |
Make inspection points part of the programme
Agree which stages need inspection before the next layer is applied. The appropriate designer, system provider or competent inspector should determine those requirements for the project. The householder’s photographs can be helpful, but they do not replace professional assessment or the required records. Keep responsibilities clear so an installer is not left waiting for an unnamed person to approve a concealed stage.
A practical programme identifies notice periods and how an inspection will be requested. It should also explain what happens if a defect is found or a detail changes. Covering work because the next delivery has arrived can remove the opportunity to check it properly. Conversely, an inspection process that nobody has scheduled can cause avoidable delays. Both problems are easier to prevent when the sequence is agreed early.
Pay particular attention to interfaces. Repairs near openings, penetrations and changes of background may affect the insulation detail that follows. Check that the accepted repair condition matches the current design. If the design has changed, the record should identify the revised drawing or instruction rather than leaving two incompatible versions in circulation.
Keep unsuccessful trials or rejected details in the project record where they explain the final decision, but label them clearly. A photograph of a rejected arrangement can otherwise be mistaken for the completed work later. The aim is an accurate account of the installation, including why an initial proposal changed, without making the final maintenance file unnecessarily confusing.

Example: a repair beside a window that will be insulated
Consider a damaged area beside a window where old render is removed during preparation. The exposed masonry differs from the initial assumption, and a repair is agreed before insulation is installed. A single photograph of the finished external wall later will reveal none of this sequence. A short indexed record can preserve the information without overwhelming the handover file.
Link the original defect photograph to the exposed-background image, the approved repair instruction and the inspection entry. Identify the window and elevation consistently. If the reveal detail also changes, include the final drawing reference so the record does not describe a repair against a superseded design.
The value becomes clear when a future fitting or local repair is proposed near that opening. The next competent person can see what was found and built instead of inferring it from the visible finish. This example is illustrative. The project’s designer and inspection arrangements determine the actual evidence and acceptance needed before any stage is covered.
Handover a record that someone else can understand
At completion, organise the information by elevation or system detail and include a short index. Retain the final design, material references, approved changes, relevant inspection records and selected photographs of concealed work. Separate completed items from anything still outstanding. A future reader should be able to establish the actual construction without reconstructing the whole project from conversations.
Include guidance for later fixings and alterations. A person installing a new light or replacing a pipe bracket needs to know that there is an insulation assembly beneath the visible finish. Drilling or fixing without suitable advice can damage the system or its details. The handover information should identify where to obtain the relevant technical guidance rather than leaving maintenance decisions to guesswork.
Keep records of any later intervention in the same place. If a fitting is moved or a local repair is carried out, add the date, method and material information. This maintains the usefulness of the original file and helps distinguish a later change from the initial installation. The record is especially valuable when the surface appearance gives little indication of what is behind it.
For a Wollaton property with historic fabric or within a designated area, retain relevant advice and approvals alongside the technical record. The Wollaton home page links the local guide and the services that may form part of the preparation. A clear repair record cannot guarantee a system’s performance, but it can make the work traceable and give future decisions a reliable factual starting point.
See housing and planning information for Wollaton and nearby places, including the source and geography behind each figure.