Wollaton exterior walls
Render repairs in Wollaton | Cracks, patches and loose areas
A repair should address the defect in the wall, not just the shape of the mark on its surface. Cracking, loose patches and staining can have different causes, and a photograph alone rarely establishes which repair is appropriate. A clear record of the affected area helps a contractor decide what needs investigating and prevents a small cosmetic brief from concealing a larger unresolved problem.

On this page
Describe the defect without deciding its cause
Begin with a wide photograph that identifies the elevation, then take closer views with a scale where it is safe to do so. Record when the defect was first noticed and whether it has changed. Note recent work nearby, such as replacement windows, altered drainage or an extension, without assuming that it caused the problem. This creates a useful history for the assessment and makes later observations easier to compare.
A crack’s position matters as much as its visibility. Mark whether it follows an opening, a change in material, a previous patch or a known construction joint. Do not fill a crack simply to see whether it returns if doing so would remove information needed by the person assessing it. Where movement or a structural concern is suspected, obtain appropriate professional advice before settling on a surface repair. A rendering contractor’s cosmetic proposal should not substitute for that investigation.
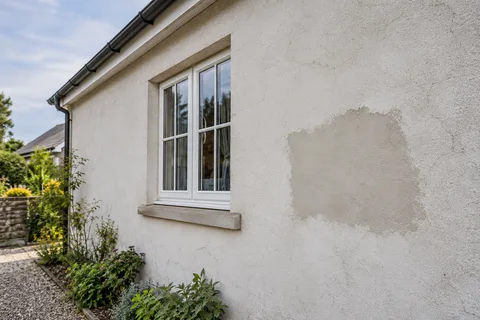
Loose or bulging material needs prompt attention to the risk of falling fragments. Keep people away from the affected area and arrange competent assessment rather than trying to remove high-level material yourself. The eventual repair boundary may extend beyond what is visibly missing because adjacent render can also be poorly attached. Ask how the extent will be assessed and how the findings will be recorded before the final scope is agreed.
Staining deserves a separate note. Record its position relative to gutters, sills, copings, pipes and planting. A mark that reappears after cleaning may indicate an ongoing source, but the colour alone does not identify it. Check accessible fittings and seek suitable advice where the explanation remains uncertain.
- Map the damage Tapping finds hollow areas; cracks and their likely cause are noted.
- Cut back Failed render is cut out to a sound edge, usually squared off.
- Fix the cause Leaking gutters, sills without drips or render below the DPC are dealt with.
- Rebuild in coats Using a material compatible with the surrounding render and masonry.
- Blend the finish Texture is matched; colour may need a coating over the wider area.
The usual order of work. The survey and the chosen products decide the actual steps.
Choose a repair boundary that can be formed properly
A repair needs a sound background and a workable edge. A very small irregular patch is not always the most practical extent, especially if it leaves weak material around the perimeter. Discuss whether the area should end at a joint, corner or other defined feature. The aim is to remove what is unsound while preserving material that can remain, with the method suited to the existing system.
Where the original render system is known, retain its product information and contact the manufacturer or an appropriate specifier about a compatible repair. If it is unknown, investigation may be needed before choosing the replacement material. Hardness, texture and colour alone are incomplete identifiers. A previous repair that appears neat may still be incompatible with the surrounding wall, so do not simply repeat it because it is the most recent intervention.
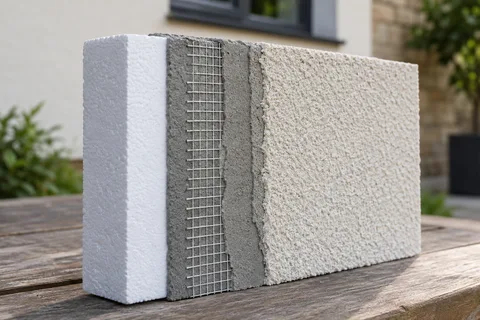
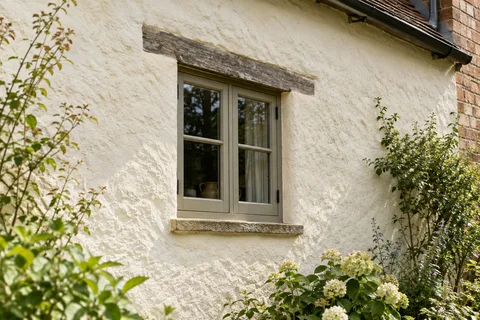
For traditional masonry, lime repairs may need a different approach from repairs to a modern cement-based or thin-coat system. The lime guide explains why the existing fabric and moisture behaviour matter. Removal methods should avoid unnecessary damage to the masonry beneath. If a trial reveals more damage than expected, record it and review the approach before extending the work.
The quotation should separate investigation, removal, background repair and the final finish. State how additional areas will be measured and approved. This keeps a sensible allowance for concealed defects from becoming an unrestricted instruction to replace whatever is encountered.
| Record | Include |
|---|---|
| Location | Elevation, height and nearby features |
| History | Date noticed, changes and previous interventions |
| Extent | Visible defect and assessed repair boundary |
| Cause | Confirmed finding or explicitly unresolved question |
| Material | Existing system where known and proposed repair |
| Follow-up | Photographs and agreed inspection or maintenance |
Agree what a successful visual match means
A new patch can differ from the surrounding finish even when its colour reference is correct. Weathering, dirt, grain size, application method and viewing angle all affect appearance. Ask for a sample repair where the visual result matters. Judge it after the material has reached the appropriate condition, not immediately after application when moisture can change its colour.
Decide whether a visible but compatible patch is acceptable, whether a larger defined area should be refinished, or whether another treatment is appropriate. These are choices to discuss with the condition of the wall in mind. Coating a whole elevation solely to hide a patch may introduce a different maintenance commitment, and it still requires a sound, compatible background. The respray page covers those preparation questions.
Do not confuse a close match in a small photograph with an invisible repair across all lighting conditions. Low sun can reveal texture differences that are barely noticeable under cloud. Look from normal viewing positions and record the agreed expectation. A realistic written description is more useful than an unqualified promise that the repair will never be seen.
Finish the repair by checking the surrounding details
If a defective downpipe or sill contributed to the problem, confirm that it has been corrected and that the new detail works with the repaired surface. Refitted brackets should use an appropriate fixing arrangement and should not damage the patch. Check that vents and intended drainage paths remain open. The repair should sit within a functioning exterior rather than become an isolated tidy square surrounded by the original defect.
Keep dated photographs after completion, ideally from the same positions as the original record. Note any agreed monitoring and follow the maintenance advice for the materials used. If a crack or stain returns, the history gives the next assessment a much better starting point than an undocumented series of fillers and paints. Do not keep adding coatings without reconsidering why the defect recurs.
For widespread failure, compare local repairs with a defined re-rendering scheme. The decision should reflect the assessed condition, the amount of retained sound material and the intended appearance, rather than an assumption that a whole new surface is always better. The Wollaton homepage links the individual-wall and whole-house guides if the investigation shows that the project needs a broader scope.
Common questions
Is a hairline crack always cosmetic?
Its cause cannot be decided from that description alone. Position, history, changes over time and the construction around it all matter. Record what is visible and obtain suitable assessment, particularly where movement is suspected. Filling the surface before an inspection may remove information that helps determine an appropriate response.
Will painting hide a repaired patch?
A colour coat may reduce colour variation on a suitable prepared surface, but differences in texture or level can remain visible. Check compatibility and inspect a sample before deciding. A patch should first be technically appropriate; decoration should not be used to cover weak material or an unresolved cause.
See housing and planning information for Wollaton and nearby places, including the source and geography behind each figure.