Wollaton exterior walls
Wall rendering in Wollaton | One elevation or a new wall
Rendering one wall can make a substantial difference without changing the whole house. The main challenge is deciding how that wall relates to everything beside it. Corners, roof edges, windows and retained coatings form the outline of the job, and each needs an intentional detail rather than a rough stopping point chosen during application.

On this page
Identify which kind of wall you are dealing with
A house elevation, a freestanding garden wall and a retaining wall may all look like masonry, but they do not perform the same job. The exposed top, the conditions behind the wall and the way water can reach it differ. Describe the wall’s purpose and construction before asking for a finish. A product suitable for an ordinary vertical elevation should not be assumed suitable for every other situation because the colour is right.
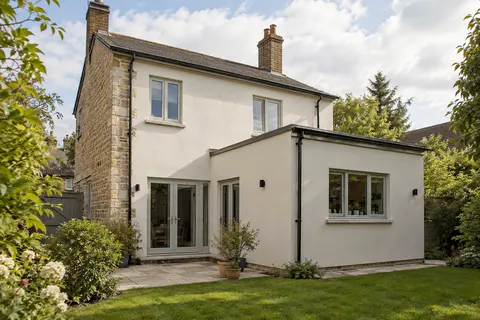
For an extension, establish whether the background is complete and ready for the proposed system. Ask about the masonry, joints, previous treatments and any areas made from a different material. The construction team should identify movement joints and details that the rendering must preserve. Covering a joint to achieve an uninterrupted surface can undermine the intended arrangement; its position belongs on the elevation drawing from the start.
For an existing gable or side wall, record previous patching and the route of pipes, cables and brackets. A satellite dish or outside light can leave redundant holes when removed, and old fixings may need more than a dab of finish over the top. List what stays and what goes. If the wall has localised damage, compare a repair specification with complete re-rendering rather than assuming the larger job is automatically necessary.
- Set the edges Decide where new render stops against brick, stone or an existing finish.
- Prepare the background Remove loose material, repair masonry and prepare suction and surface key. Existing paint needs a specified removal or alternative treatment.
- Base coat Built up to level the wall, with mesh where backgrounds change or crack.
- Finish Matched to the rest of the house or chosen as a deliberate contrast.
- Shed the water Copings, sills and the base bead keep rain off the top and away from the bottom edge.
The usual order of work. The survey and the chosen products decide the actual steps.
Use natural edges and deliberate divisions
An external corner can provide a clear visual stopping point, but the return still needs enough space for a sound detail. Draw how far the work continues and what happens at the adjoining finish. If the new coating ends part-way across a face, ask why that position has been chosen and how the edge will be formed. A faint feathered transition is not always realistic with a textured render, particularly where the existing surface has aged unevenly.
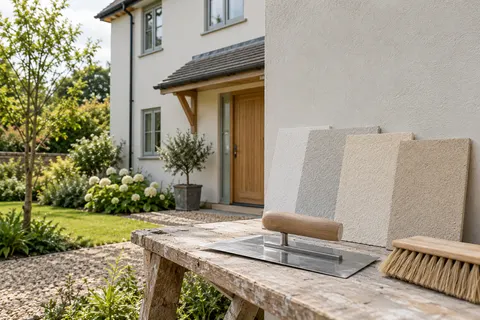
Colour matching is also affected by texture and light. Two areas with similar pigment can look different when one has a finer grain or a different direction of tooling. Compare a cured sample beside the retained wall, viewed both close up and from the usual approach to the house. If the difference remains obvious, consider a deliberate contrast or extending the work to a logical boundary. The objective is an agreed appearance, not a verbal assurance that nobody will notice.
At windows and doors, specify the reveals and the edge against the frame. Increasing the surface depth can reduce sill projection and alter how a rainwater drip works. A neat bead cannot compensate for a sill that no longer throws water clear of the wall. Resolve any extension or replacement before the finish is applied. The same principle applies to air bricks and other openings: the new surface must accommodate their function.
| Location | Decision to show |
|---|---|
| Top edge | Roof, coping or flashing connection |
| Side edge | Corner return or defined stop against retained work |
| Openings | Reveal depth, frame junction and sill projection |
| Base | Finished ground relationship and lower termination |
| Fittings | Removal, fixing method and reinstatement |
Do the preparation that this wall requires
Preparation depends on the background, not the size of the job. A small wall with loose paint, salt deposits or weak old render may need more investigation than a larger area of clean new blockwork. Record what is present and ask the system supplier or specifier how it should be treated. A general phrase such as “prepare as necessary” gives little basis for comparing quotations or checking whether the agreed work was carried out.
Where removal is proposed, establish how much material is coming off and how the background will be repaired afterwards. A trial can reveal whether the existing coat releases cleanly or takes parts of the masonry with it. Stop and reassess if the method causes unexpected damage. The pebbledash removal guide covers this distinction between taking off a finish and leaving a suitable surface for the next one. They are separate stages, even if one contractor undertakes both.
Do not use a new render layer as a diagnosis for recurring wet patches. Check obvious sources such as gutters, copings and penetrations, then obtain further advice where the cause is unclear. A stain beneath an overflowing gutter needs a different response from general surface dirt. Correcting the source before coating also makes it easier to judge whether the wall has dried sufficiently for the specified materials.
Choose the finish and agree the limits of the quotation
Silicone and monocouche finishes can produce different textures and require different build-ups. Ask for the complete system name and the proposed background treatment, not simply “smooth render”. If the wall is traditional masonry, a lime specification may be more appropriate, but that decision needs an assessment of the existing construction. A modern extension and an older adjoining wall can legitimately need separate systems while sharing a carefully chosen visual relationship.
Include access and protection in the quotation. A side elevation reached through a narrow passage may require equipment and material handling that are not obvious from its area. Identify shared access, fragile surfaces and planting. Agree how the wall will be protected between stages and whether the work affects neighbouring property. These are practical project decisions, not reasons to leave the surface preparation vague.
Before the final inspection, gather the sample, the elevation drawing and any approved variations. Check the new wall from the same viewing positions used at the start, then look closely at its edges and fittings. Keep the finish reference for later maintenance. For a wider project, return to the Rendering Wollaton overview and compare the individual-wall scope with the whole-house guide.
Common questions
Can a boundary wall use the same finish as the house?
Possibly, but it needs its own assessment. Its exposed top, background and conditions on the other side may differ from a house elevation. Specify an appropriate coping and complete system rather than extending the house product over every surface by default. A retaining wall needs particular consideration of its construction.
Does the new wall have to match the old one?
No. A deliberate contrast can be a practical design choice, provided any relevant approval requirements are addressed. Compare samples with the retained materials and show the boundary clearly. If a close match is preferred, agree realistic limits for differences in colour, texture and weathering before accepting the work.
See housing and planning information for Wollaton and nearby places, including the source and geography behind each figure.