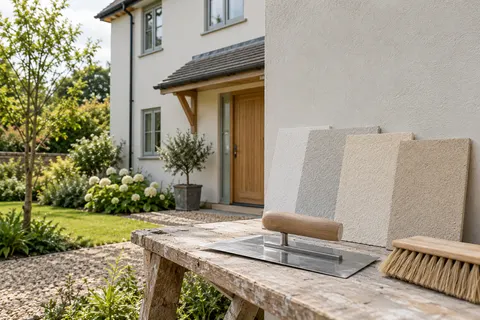
Wollaton exterior walls
House rendering in Wollaton | Plan the whole exterior
Whole-house rendering works best when the exterior is treated as a set of connected details. The front may be easy to see, but the side passage, rear extension and roof junctions often determine how the work is organised. Before choosing a texture, put each elevation on the same schedule and decide what will remain, what needs repair and what will be replaced.

On this page
Draw the finished house before specifying the coats
Take photographs from positions that show complete elevations. Mark retained brickwork, rendered panels, timber, roof edges and openings, then draw the proposed finish over copies of those photographs. This does not need to be an architectural presentation. Its purpose is to remove ambiguity about where the work stops and to expose awkward joins while they are still easy to discuss. A contractor should not have to guess whether a narrow return behind the garage belongs in the quotation.
Consider the proportions of the house as well as the colour. Covering a recessed panel or building out a wall can change the apparent depth of windows and the prominence of a plinth. If an original feature is to remain visible, identify the edge around it. If the proposal includes external wall insulation, show the greater finished depth on the drawing and check whether the existing sills and eaves still project far enough. That is a design issue to resolve before access equipment arrives.
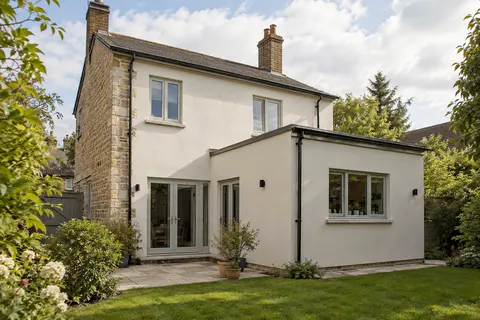
New extensions need particular attention where they meet older construction. Matching the visible finish does not make the backgrounds identical. A movement joint or deliberate break may still be necessary, and a continuous colour can cross that break without pretending it has disappeared. Ask for the junction detail in the specification. The same applies where a lightweight section meets masonry: the support and system requirements should be established for each part, not inferred from the appearance of its neighbour.
- Scaffold and protection Windows, doors, paths and planting are covered; downpipes, lights and satellite brackets come off.
- Old finish tested or removed Failed render is removed; the survey decides whether any sound areas can remain within the specified system.
- Masonry repairs and beads Cracked bricks and open joints are repaired; corner, stop and base beads are fixed.
- Base coats Sand-and-cement scratch and float coats, or a manufacturer basecoat with mesh.
- Finish coat A painted, scraped or thin-coat coloured finish, applied in suitable weather.
- Fittings and junctions Fittings are refixed through the new surface; sills, roofline and abutments are sealed.
The usual order of work. The survey and the chosen products decide the actual steps.
Make the survey useful to the people pricing the work
The survey should distinguish sound retained material from areas requiring removal. Record visible cracking, hollow or loose sections, staining and changes in the existing finish. Ground-level inspection has limits, so the quotation should say what will be checked from access equipment and how additional findings will be handled. A concealed defect is not automatically a reason to abandon the project, but it should trigger a documented decision rather than an unrecorded change of method.
Check water-shedding details before focusing on the face of the wall. A short sill, failed joint at a roof abutment or leaking downpipe can repeatedly wet a small area. Applying a new finish without dealing with that defect may leave the original problem in place. Ask which trade is responsible for each correction and when it must be completed. Rendering, roof work and replacement windows need a coordinated sequence even when separate contractors carry them out.
Traditional masonry may need a different approach from modern blockwork. Do not identify the existing binder purely from its colour or hardness at one broken edge. Where there is uncertainty, the specification should include appropriate investigation and compatible repair advice. The lime guide explains the questions surrounding older backgrounds. If existing pebbledash is being removed, agree a trial area and photograph what it reveals before committing to removal across all elevations.
| Record | Example of the decision needed |
|---|---|
| Existing finish | Retain sound areas or remove to masonry? |
| Openings | Keep, extend or replace sills? |
| Fittings | Who removes and reinstalls each item? |
| Junctions | Where do materials or construction change? |
| Access | Which doors, paths and boundaries must remain usable? |
Keep an occupied house usable during the work
Agree where materials can be stored and how deliveries will reach them. A driveway that looks generous in a photograph may also be the only route to the front door. Leave room for everyday movement, bins and any necessary emergency access. If a path is temporarily unavailable, decide the alternative before work starts. Make the arrangement clear to everyone living at the property rather than relying on a discussion with one person at the survey.
Protection should cover more than glass. Identify vulnerable paving, painted joinery, outside taps, vents, lighting and planting near the wall. Mature shrubs can make safe access difficult and may be damaged by moving boards or debris. Decide what can be moved, protected or carefully cut back, and who is responsible. Avoid tying protective coverings to branches or placing loads on a bed simply because it is close to the work.
The programme should allow for the chosen system’s application and curing requirements. Coats, drying periods and weather protection cannot be reduced to a promise of consecutive working days regardless of conditions. Ask how unfinished edges and exposed backgrounds will be left if work pauses. A clear update about the next stage is more useful than an optimistic date that ignores the condition of the wall. Keep a record of any agreed changes to the sequence.
Inspect the details while they are still accessible
Arrange inspection points before the finish hides the preparation. These might include exposed masonry after removal, repaired backgrounds, mesh and beads where specified, and the finished junctions around openings. Photographs should identify the elevation and date so they can be understood later. They supplement the specification; they do not prove that every hidden component is correct merely because one example looks tidy.
At completion, compare the work with the agreed sample and elevation schedule. Look at corners, lower terminations, sills, vents and refitted downpipes as well as the broad colour. Check that service openings have not been blocked and that temporary protection and waste have been removed. Keep any unfinished items in a written list with responsibility and an agreed next action. This avoids losing small but important tasks once the scaffold is dismantled.
Retain the product names, colour references and maintenance instructions with the house records. Future repairs are easier to discuss when the original system is known. The Wollaton home page links to the individual finishes and the cost guide; use those alongside this whole-house schedule if you need to compare a full refurbishment with work on just one elevation.
Common questions
Can the front be finished before the rear?
A phased project can be considered if its boundaries, access and temporary conditions are planned. Ask how the later phase will connect visually and technically to the first. Retain the system and colour references, while allowing for the possibility that weathering and different application dates may affect the match.
Should new windows be fitted first?
Coordinate frame positions, reveals and sills before deciding the sequence. The appropriate order depends on the work and the specified details. Replacing windows after a new finish can disturb its edges, so the window and rendering contractors should agree responsibilities and any temporary protection before either package starts.
See housing and planning information for Wollaton and nearby places, including the source and geography behind each figure.