Wollaton exterior walls
Making an extension junction look deliberate
An extension does not have to pretend that it was built at the same time as the house. A carefully placed junction can make the old and new parts sit comfortably together while allowing each wall to have the construction detail it needs. The difficult result is usually the accidental one: a finish that almost matches, a line that stops awkwardly or a movement joint concealed for the sake of a photograph.

On this page
Decide whether the extension should match, complement or contrast
Matching means more than selecting a similar colour. The original wall may have a different grain, weathering pattern and degree of flatness. Even if the new material is nominally the same shade, those differences can remain visible. Before choosing this route, look at a representative sample beside the existing surface and decide how close the match needs to be. An honest near-match may be acceptable; an expectation of invisibility may not be realistic.
A complementary finish can be easier to control. For example, a clearly defined rendered extension can sit beside retained brick without trying to reproduce it. The colour then needs to work with the brick, roof and frames as a group. The junction becomes an intentional part of the design. This does not mean every extension should be a strong contrast, only that the relationship should be chosen rather than left to the last stage of the build.
Consider the whole view from the garden and the street. A narrow return that seems unimportant on an elevation drawing can be very visible from the path. Take photographs from normal viewing positions and mark the proposed boundary on them. If the finish wraps around the extension, show exactly how far it continues towards the original house. These drawings help everyone discuss the same line.
The wall rendering page covers the practical limits of a single elevation. Use it alongside the design decision so the preferred appearance has a workable stopping point. A visually attractive sketch still needs a suitable edge detail where the materials meet, and that detail should be resolved before the wall is ready for its final coat.
Let the construction joint remain part of the design
New and existing construction may need a movement detail between them. Its purpose should be established by the appropriate designer, and the finish must accommodate the specified arrangement. Applying continuous render across a joint does not remove the movement it was designed to allow. If the proposed joint is visually awkward, discuss its location and expression while the design can still change rather than hiding it during finishing.
The junction may also involve a change of background. Masonry, sheathing and existing render can each have different preparation and support requirements. Ask for a detail that identifies those materials and the system components at their meeting point. A colour schedule cannot answer that question. Keep the construction information and the appearance decision together so a later product substitution does not undermine an already agreed interface.
If the original wall has an old coating, establish whether it can remain and how the new work ends against it. Local removal may reveal damage or additional layers. A small investigation at the junction can be useful before the entire extension is finished. Record the finding and any repair required, especially if the initial design assumed sound masonry that is not actually present.
Where the extension is part of a whole-house refurbishment, the same visible finish may be proposed over several backgrounds. That can work only within a suitable specification for each part. The house rendering guide explains how to keep those differences in an elevation schedule. Uniform appearance should be an outcome of coordinated details, not a reason to ignore the differences beneath it.

| Approach | What needs agreeing |
|---|---|
| Close match | Acceptable colour and texture difference after a sample |
| Complementary finish | A clear boundary and a colour that works with retained materials |
| Deliberate contrast | Exact extent, returns and treatment around openings |
| Continuous colour across a joint | A technical joint detail that remains functional |
Test colour and texture at the actual meeting point
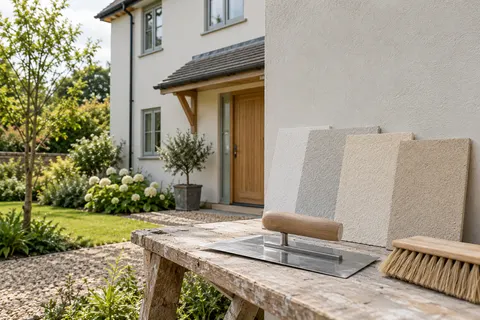
A sample placed in the middle of a new wall cannot show how the finish looks beside the old house. Put the comparison where both materials can be seen together, without damaging retained work. Include the intended grain or finishing method. A painted colour card may narrow the shortlist, but it will not demonstrate the shadow and variation of a textured render.
Look at the sample in ordinary daylight and, where possible, at different times. Low sun can emphasise texture and reveal changes in plane. The same colour may appear different on a shaded return and a broad sunlit face. Decide which viewpoints matter most and avoid choosing solely from a close-up photograph taken under one convenient lighting condition.
Monocouche and thin-coat finishes should be compared as different specifications, not just different routes to the same colour. Their backgrounds and application requirements may differ, and the texture of an accepted sample should relate to the actual proposed material. If the system changes after pricing, revisit the sample rather than assuming a similar colour name makes the result equivalent.
Keep the accepted sample or a clear record of it through the project. Label it with the product, colour and finish reference, and note which elevations it applies to. This helps resolve questions about whether the contractor is reproducing the agreed surface or a later informal preference. It also gives future maintenance work a better starting point.
Example: a brick house with a rendered rear addition
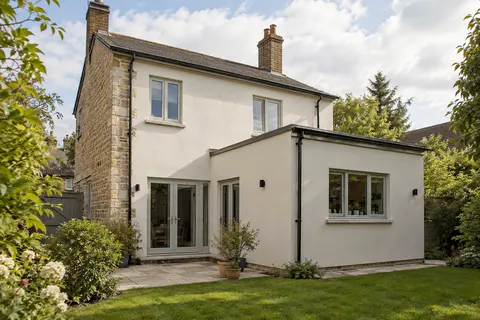
Imagine an extension where the original brick corner remains visible from the garden path. Carrying the new render a short distance across that corner might appear to simplify the finish, but it also creates a narrow strip with no obvious architectural purpose. Keeping the new finish on the extension and showing a deliberate junction can produce a clearer result, provided the technical detail supports it.
Now suppose the extension’s roof connection requires a particular flashing arrangement. That detail may influence the visible boundary and the order of work. Resolve it with the designer and relevant trades before treating the colour choice as final. A pleasing elevation sketch cannot remove the need for a functioning roof interface.
This is an illustrative design comparison, not a completed project. Its lesson is practical: examine the awkward corner in context. A small sample and a marked photograph can help decide whether a proposed line looks intentional from the route people actually use, while the construction drawing establishes how it is built.
Check the roof, openings and lower edge as one composition
The vertical junction between old and new walls is only one part of the connection. A roof abutment, parapet, gutter or sill can carry water towards it, and the finish needs to meet those details properly. Ask who is responsible for each interface and whether any work must be completed before rendering. A tidy vertical line is not enough if the top of the wall remains unresolved.
At the bottom, consider how the extension meets paving and planting. If landscaping will follow later, record the intended finished level and the render termination. Otherwise a carefully detailed edge can be buried or splashed differently after the rendering team has left. The same applies to steps or a new patio that changes the way people approach and view the wall.
Think about maintenance before choosing an exceptionally subtle match. If the original and new walls have different systems, later repairs may need different products even though the current colour looks continuous. Keep that information in the handover record. A deliberate junction can make future local work easier to define, whereas an undocumented blend can leave the next contractor guessing where one construction ends.
In Wollaton’s separately designated conservation areas, the proposal may also need to respect the relevant appraisal and any property-specific requirements. Check the actual boundary and seek the appropriate advice about the intended change. The Wollaton homepage brings together the local references and service guides. The aim is a junction that makes sense both as a building detail and as part of the finished house.
See housing and planning information for Wollaton and nearby places, including the source and geography behind each figure.